Today's post is written by Sue Tucker, our CFO and quilting enthusiast who has been a part of things here since the beginning of Studio 180 Design.

Ever since we started planning for our Star 60 tool, I was intrigued by how it might be used in combination with One Block Wonder (OBW) designs. After all, OBWs are based on equilateral triangles, and the Star 60 unit is also an equilateral triangle. Seemed like a perfect fit to me. With the OBW world already adding cubes into their designs, stars seemed like a perfect next step.
If you aren’t familiar with OBWs, let me explain a little about the process. With OBWs you cut six matching equilateral triangles similar to how you would for a Stack n Whack. You arrange each set of triangles into a hexagon with the same corner in the center, creating a kaleidoscope effect. Stitch them together in two sets of 3 half hexagons, pin those together into a hexagon (for easier construction later) and design your quilt by arranging all those hexagons into a pleasing design. Then you sew everything together. It’s a very different process from the piecing we usually do at Studio 180, because you have no idea at the start what your final quilt is going to look like. There are no patterns, there is a process.

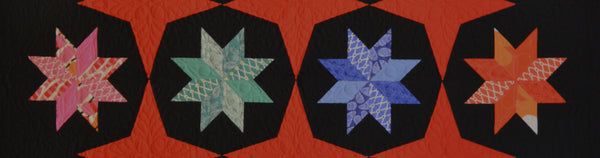
Diane Marvin, one of our Certified Instructors, made the gorgeous OBW below, and like so often in the process, ended up with extra hexagons. She decided she wanted to use them on the back of the quilt, interspersing them with stars she made with her Star 60. As you can see, she made a lot of stars the same size as her hexagons, selecting colors that coordinated with the surrounding area.

To make a star, you make 6 Star 60 units. The Star 60 unit is the most basic unit that you make with the Star 60 tool. It is a triangle made up of a diamond and two smaller triangles. You use the tool to cut the pieces, sew them together, and then use the tool again to trim your Star 60 unit. Your unit ends up perfectly sized with the seams exactly where they should be. You’ll put 6 of these together to create the star.

Here’s a walk-through of how it works. You can find much more detailed instructions included with the tool, and step by step videos on our website and YouTube channel.
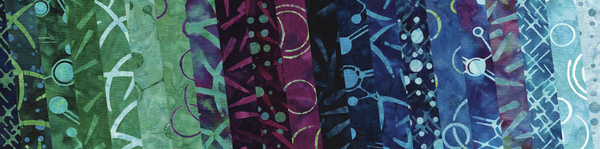
First you cut strips – one for the diamonds and one for the triangles. The Star 60 instruction set has a chart with the strip widths you’ll need for the size units you’ll be making. Diane used 6” hexagons, so each of the Star 60 units would finish to 3”. Her diamond strips were 2¼” and her side triangle strips were 2½”.
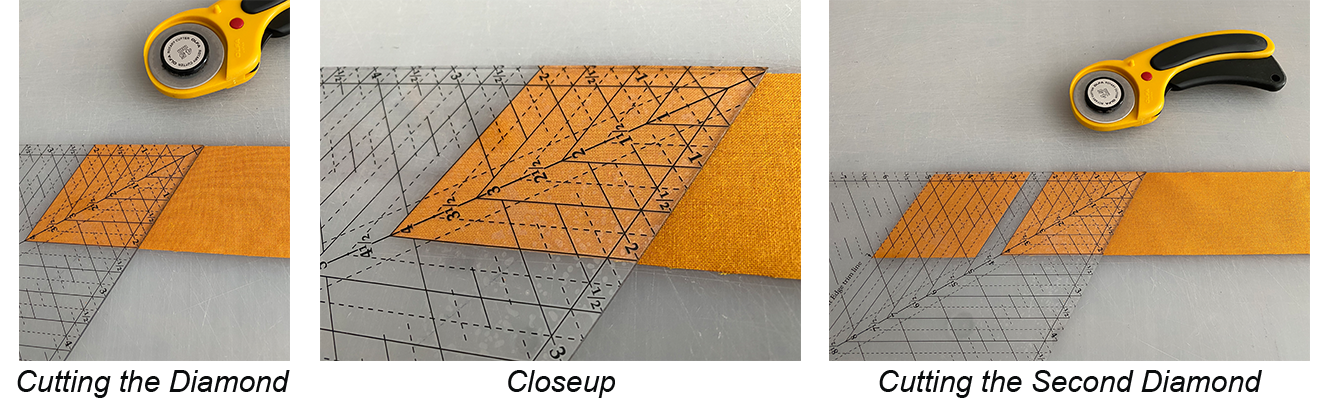
For the diamonds, you start with a 60 degree cut at the end of your strip, then use the tool to cut the diamond. The chart tells you which diamond sub-cut lines to use, in this case 4”. The photos show right-handed positioning, but our instructions and videos cover left-handed positioning, too. Continue cutting until you have the number of diamonds you need, 6 for each star.

For the triangles, you position your tool on the strip, aligning two lines on the tool with the edges of your strip - the line labeled with your strip size and the little line at the top of the tool just below the point. Cut on both sides of the tool, creating your first triangle. Rotate the tool, position the lines as well as the cut edge, and cut again. Repeat until you have the number of triangles you need, 12 for each star. You can keep your strip folded to cut pairs, if desired.

To sew your pieces together, position them as shown. Stitch the right-hand triangles to the diamonds. Press toward the diamond. Repeat with the left-hand triangles, but this time pressing toward the triangle. You can press both of these seams open if you prefer, but if you press to the side as described, the seams will nest when you’re stitching the star together and be easier to align.


Next comes the trim. There are different ways this trim can be done, but if you trim all three sides of the unit at this point you’ll have the dog ears that are helpful later when you are aligning half hexagons in OBWs. Start with the tip of the diamond. Find the guidelines on the tool for the size unit you’re making – in this case the 3” lines because you’re making a 3” unit. Align them with the seams on your unit and trim both sides.

To trim the back end, find the Flat Edge Trim Line on your tool, align that with the seams and trim the final edge of your unit.

All that’s left is to stitch them together into half hexagons. Press your seams open. Now you’re ready to pop them into your OBW!
 Here are some photos of Diane’s design process with the stars and her finished quilt back.

Well done, Diane!
Next time, I’ll talk about how I incorporated double size stars into my first OBW, and how I cut my side triangles so that they blended into the surrounding hexagons. Hope to see you there!
To see other examples of using Star 60 stars in OBWs, you can check out the blog of another of our Certified Instructors, Jackie OBrien, who is also well known in the OBW world. Jackie has written about two OBWs that she has done with stars. One is called “OBW 76 – A Prickly Situation” and the other is “OBW # 78 – The Road to Oz” You can find her blogs at “If these Threads Could Talk”, where she also provides loads of other great information about the OBW process. She also has information there on other Studio 180 tools and some of her own patterns, too, so it’s a great all-around resource.
Another great resource on OBWs is an exceedingly well moderated FaceBook group called “One Block Wonder Quilt Forum” with over 25,000 members that is chock full of well organized, useful information and tips. Their members are always ready to help you when needed and share your excitement about your successes. I strongly encourage any of you interested in trying OBWs to join and check out that page. It’s full of inspiration, information, and community.
I hope you are excited to try using your Star 60 with OBWs. If you need to pick up a Star 60, you can find them at your local quilt shop or on our website, here. We’d also love to see the OBWs you create with stars, and encourage you to post your photos on Instagram with the hashtag #studio180star60obw.
See you in a few days for Part 2!